Optimizing Project Management: The Benefits of Using Planner and Loop
Understanding the unique roles of Microsoft Planner and Loop can simplify your project management process and enhance team collaboration. Let's see how in today's blog 🙌
The Roles of Each Tool
Each tool plays a different role. Sometimes their purposes can overlap a little, and it can feel confusing. Which should I use when?
I try to look at these as similar to actual tools in real life in your toolbox. A hammer can pound a nail in, pry a nail out, demolish things, etc. How is that different from a crowbar? Or a sledge hammer?
When things are physical and tactile, it can be easier to comprehend when one thing is better than the other. In the digital world, it's a little tougher. The easiest way to understand these tools is by using them and getting comfortable working with them. Until then, here's my shortcut:
Loop: Will serve as our project documentation and knowledge-base, and give us a place to collaborate together.
Planner: Will serve as our General Task Management for the project.
These two tools together are 🎉
Let's dive into how we set up and configure each one (this assumes you have access to both tools already. Check the waffle menu in the top left of your Microsoft 365 tools).
Set Up an Initial Loop Structure
Loop is going to be our hub for a project. The thing that serves as the jumping-off point for everything we need.
When you start creating in Loop, it's pretty empty and can be intimidating. We'll be using some of the premade templates built into Loop, as well as some structure we've seen work well in the past.
An important note about Loop Workspaces. This is what gives you a separate "home" for all this new content and structure, specifically for you team. The method we often use is: One Project = One Workspace.
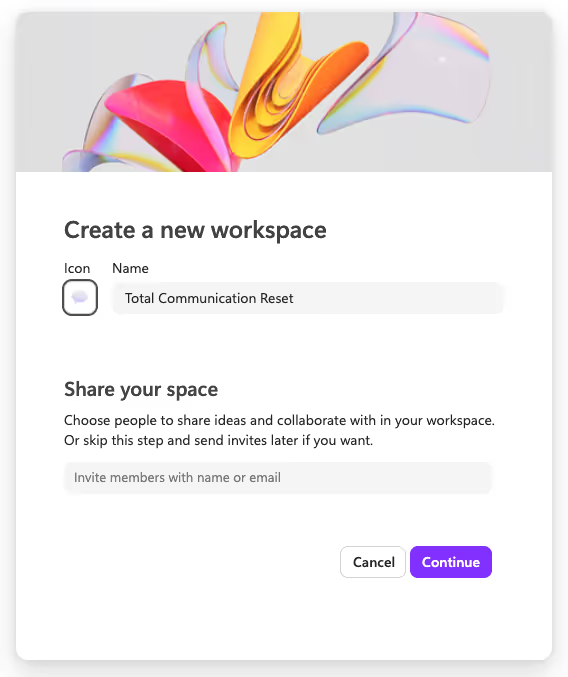
This is not set in stone, and you can use you best judgement here. If this project feels new/separate from other efforts, create its own workspace. If it feels like it's in context to another effort you're working on, you may be able to just start building within an existing workspace.
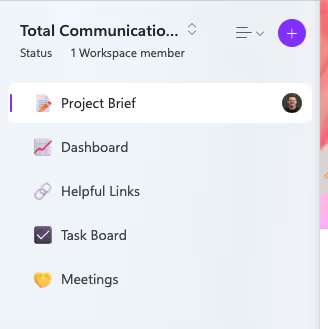
So create or navigate to your workspace, and set up the following pages:
- Project Brief - Use the Project Brief template provided in Loop
- Dashboard/Progress - Blank Page
- Helpful Links - Blank Page
- Task Board - Blank Page
- Meetings - Blank Page
Project Brief
We think the Project Brief page template in Loop is pretty great.
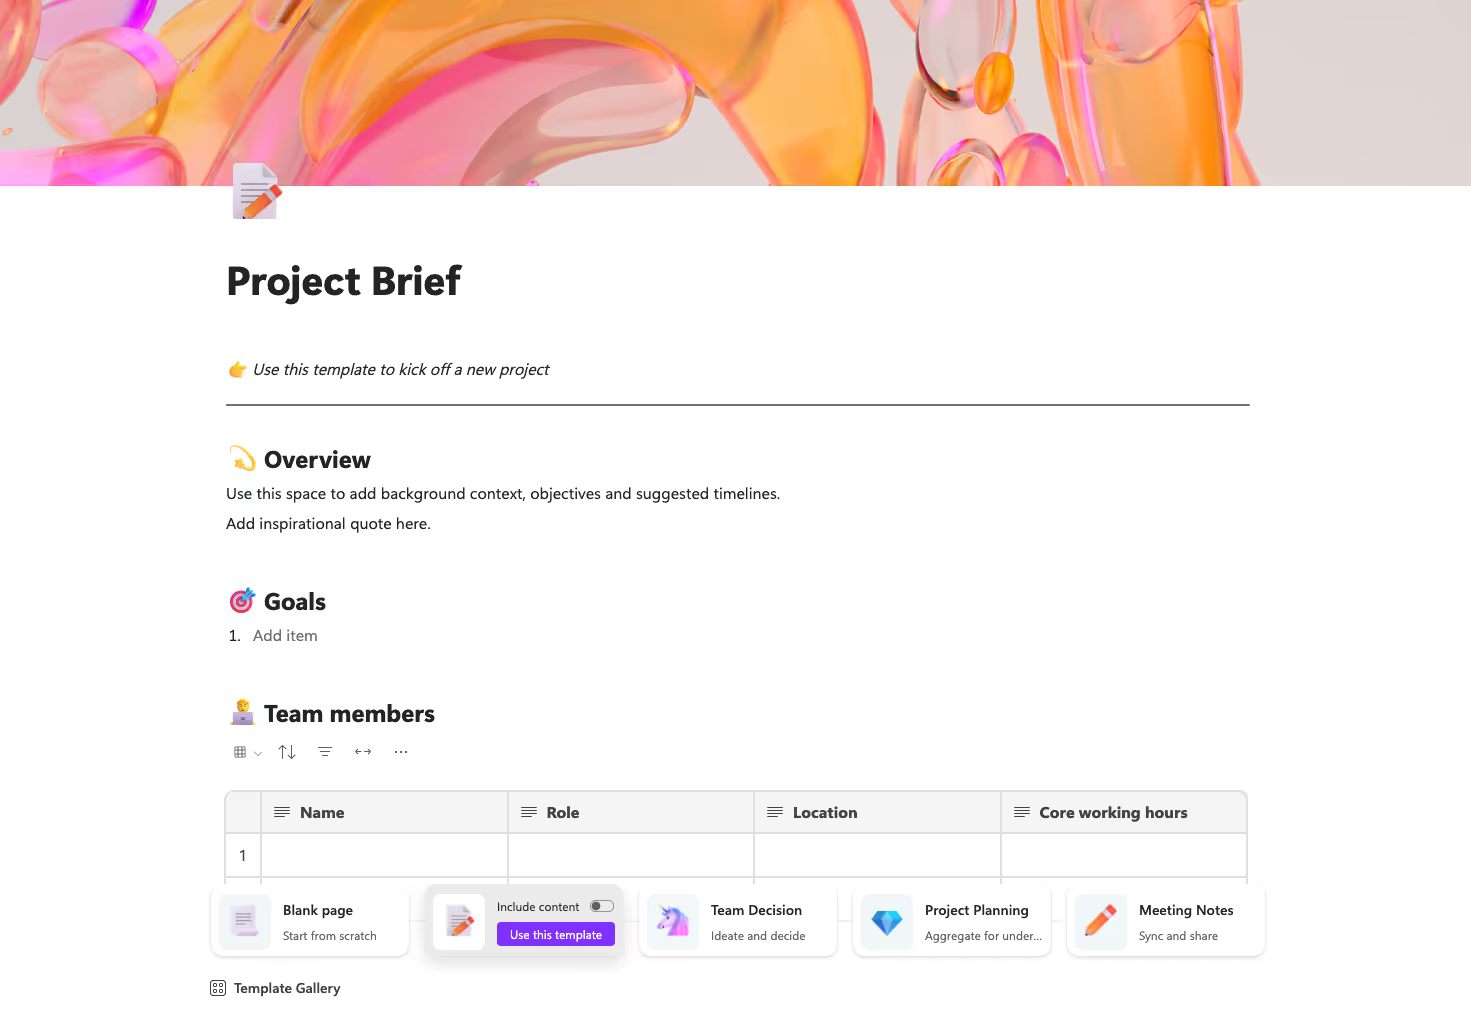
In this page you get five sections:
- Overview - Give me a fly-by of the project in a few sentences.
- Goals - What should be accomplished?
- Team members - Who is involved in this project?
- Project deliverables - What does this project actually need to produce?
- Helpful links - You may notice this seems like a duplicate to the page we created earlier, but sit tight for the moment.
Dashboard/Progress
This is your home base for seeing what's going on in the project. Leverage components to pull from other pages.
We have a component for a nested page called "current focus" where we have it laid out as a kanban board to track all the current stuff we're working on. Think progress tracking, not task management.
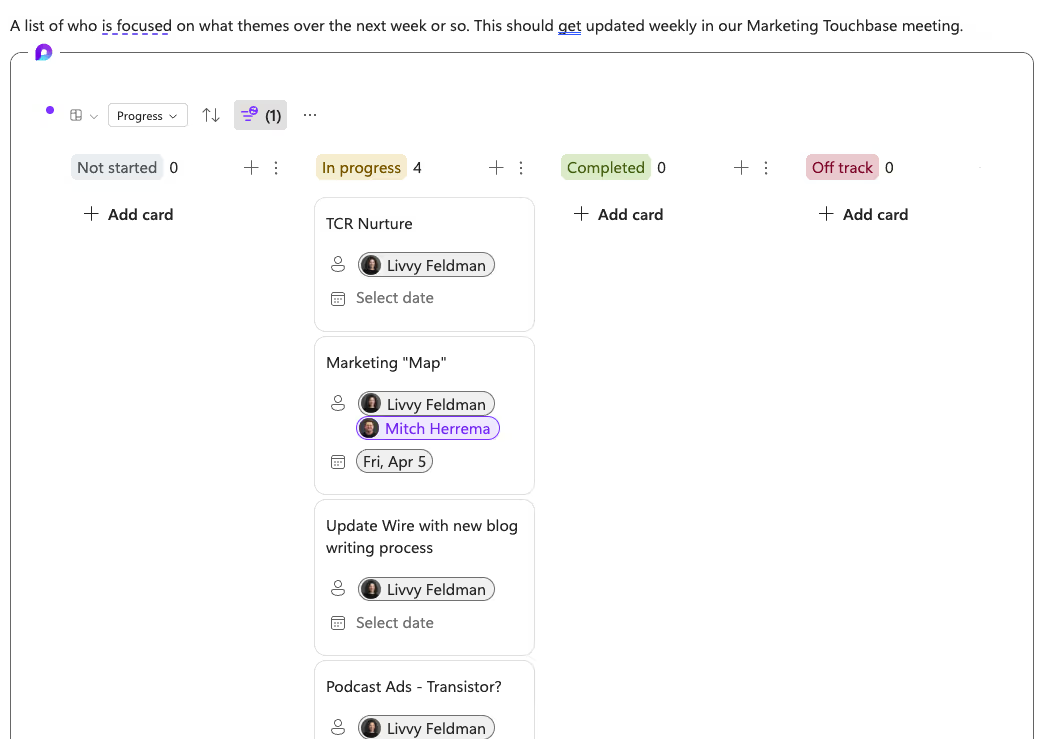
We then have a component for our quarterly goals. What are the big picture things we're focusing on over the quarter? Who is responsible for them? When do we need them done by so we can prioritize? These quarterly goals "feed" the current focus board with the smaller progress tracking.

So we have Quarterly -> Current Focus -> Tasks
Tasks is not entirely helpful in context to this dashboard page. It's too tactical/noisy. They live on another page. In the future, if Loop gets a little more fancy, we could roll up something like "tasks completed in the past week" to this dashboard.
Each of these live on their own pages so we can manage them separately if we want, but then we can share as components to display them all on the single dashboard page.
Links + Messages
This one depends a little on the specific project, but I've found this page really helpful. In the marketing world, we need to share links to a LOT of things often. This page is not so much for the use to jump-off to different content, more so be a resource to grab links to share with others quickly.
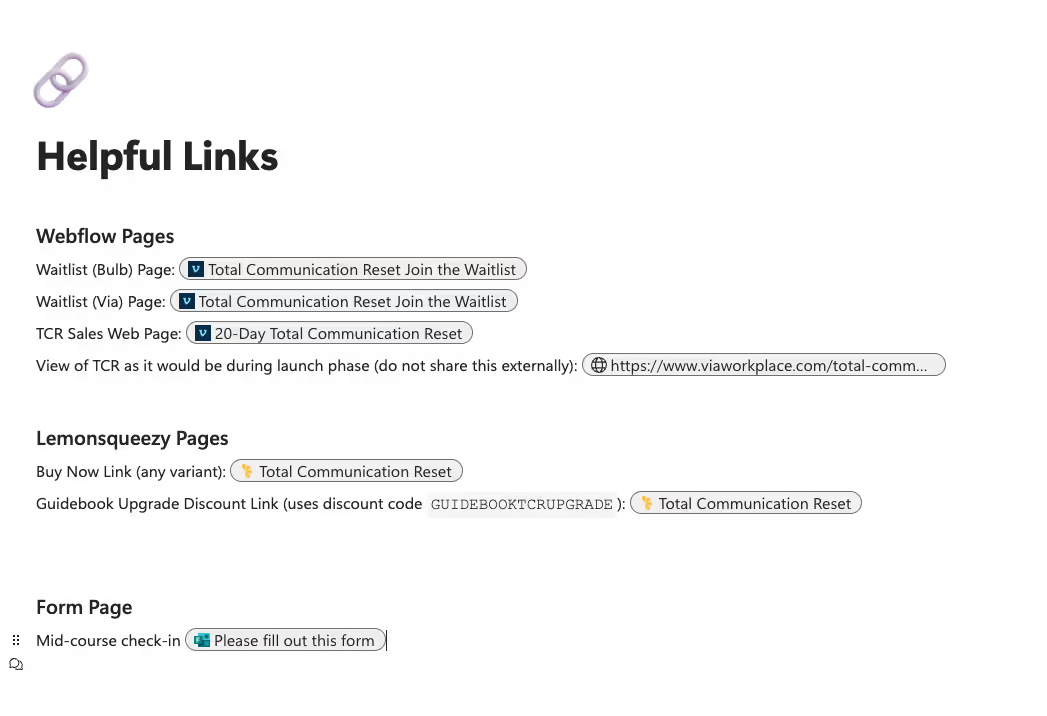
We also keep copy on this page. The stuff we send all the time with the right wording/phrasing we should be using consistently. It makes it really easy for our team members to drop in, copy a message, and paste it in chat to something like a meeting, webinar, or livestream.
Task Board
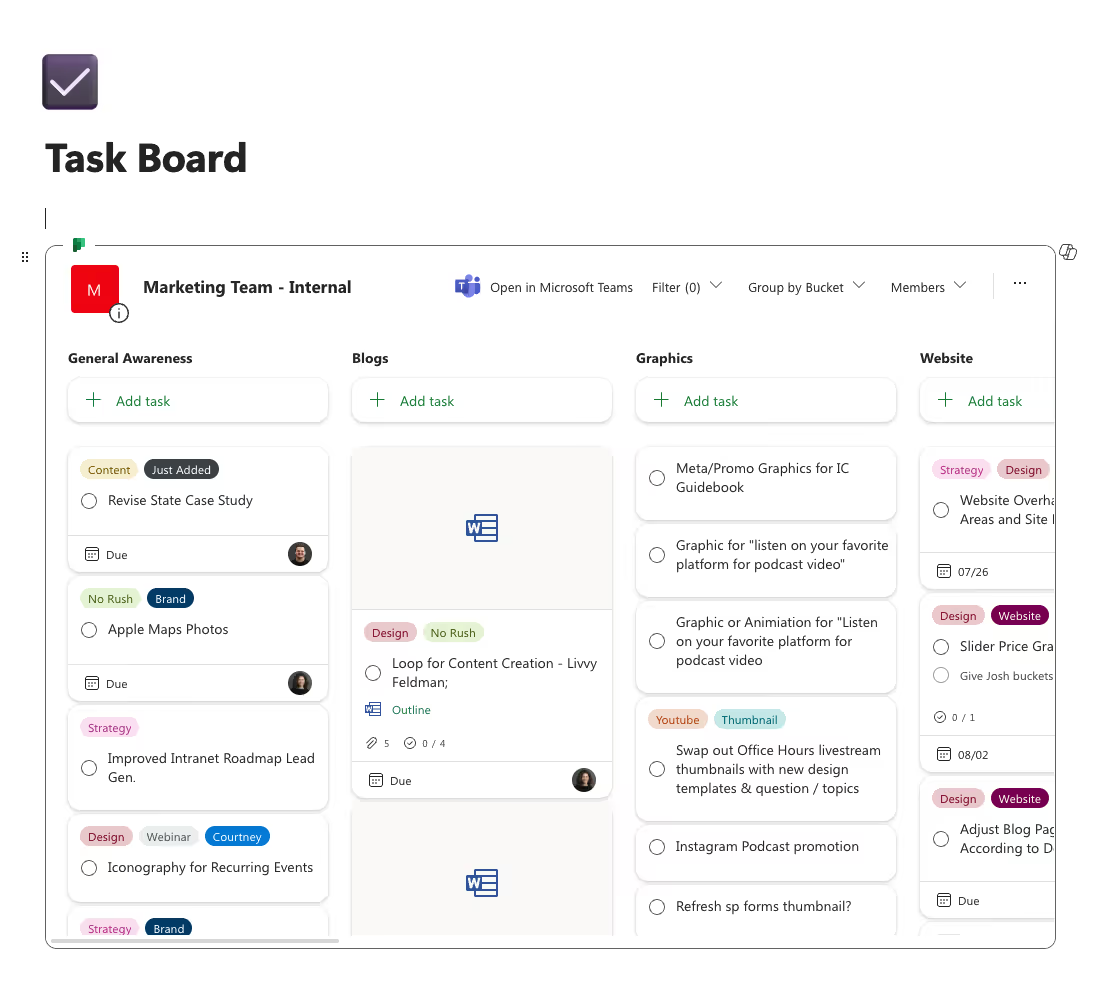
This is where actual tasks can be tracked. Whether you use Tasks right within Loop, or leverage a Planner board, we want them to roll up here for easy access. I go a bit into how Planner and Loop work together in my other blog. Reading that will help you decide if you can get by just using the Task component in Loop, or if you need Planner. For the purposes of this post, we're going to assume you need a Planner board.
SELF ASSESSMENT
Is your business getting full value from your M365 subscription?
Billions of dollars are wasted each year on underused subscriptions. Take 3 minutes to find out where your tools are driving results, and where they’re holding you back.
Find Out Now

Is Team Communication Holding You Back?
Find Out in Just 2 Minutes.
Take our quick scorecard to uncover communication gaps and hidden barriers within your team.
Set Up Your Planner Board
Like I said earlier, Planner is going to be the home for all of our tasks. This will allow it to roll up in all the helpful places in other Microsoft tools.
If the below doesn't seem quite right and look like what you have on your computer, it's likely Microsoft finally launched the New Planner, and we will be updating this post soon 🙂
To start, you need to create a new Planner Board. Go to Planner (tasks.office.com, not Planner within Teams, it doesn't work with Loop right now), click New Plan and choose your options. You can either start with blank/basic plan, but you're welcome to browse/choose any of the templates as well. After that you'll need to name the plan and add it to a group. Depending on the settings set by your IT, you may be able to create a group later, but I recommend you get one set up so you can select it at this stage. This group is what's going to give the right team members access to the board. It has nothing to do with Loop permissions, which I think is a missed opportunity, but is important to note.


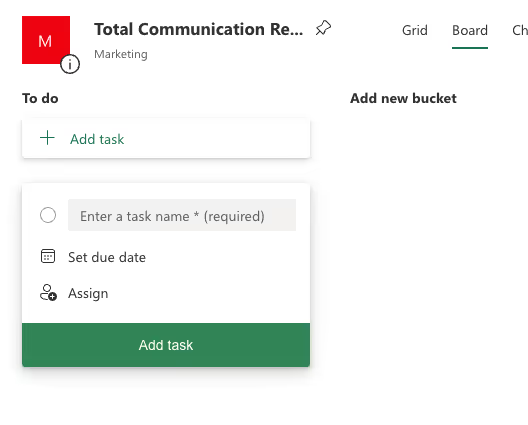

So you'll want to:
Set up a group -> Create a Plan
Now we can customize the Plan. If you chose a template earlier, you may be able to call this part complete. If not, The most important thing for you to define is the different buckets for your tasks.
For example, ours are:
- General Awareness
- Blogs
- Graphics
- Website
- Podcast
- and more as needed
Think of these as all the different contexts you would like to manage tasks within and group together.
Now we want to add this board to our Loop workspace. Copy the link to the page, and go paste it into the Task Board page in Loop.
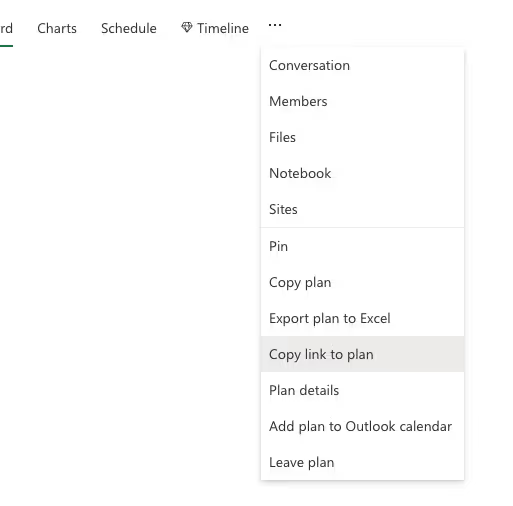
Wa-lah, it shows up right on the page.

Carrying Out Meetings
Now that we have our structure in place, one of the biggest benefits we'll see is during meetings.
Get Ready Before the Meeting
Before your meeting starts, we need to make sure we're well-prepared. Start by checking the Dashboard/Progress page on Microsoft Loop. Make sure it's up-to-date with the latest happenings and news. This will give you a clear picture of the current status of your projects. Next, review the Task Board page to see how tasks are progressing. This will help you identify key points to talk about during the meeting.
Kick Off the Meeting
When it's time to start the meeting, share the Loop page on a screen so everyone can follow along. Begin with a quick rundown of what you'll be covering, using the Project Overview page as your guide. This helps set the stage for the discussion and ensures everyone is on the same page.
💡 Pro tip: Hide the sidebar in Loop to make sure all the focus is on the right content being shared
💡 Another Pro Tip: If you have Copilot, start transcription! You'll be able to use it to take notes for you automatically and create a summary of the meeting that can be kept safe in this Loop workspace for use later.
Check on How Things Are Going
Dive into the Dashboard/Progress page during the meeting. Discuss the main projects you're working on and review the big goals for the quarter. Celebrate what's going well and make adjustments for challenges or obstacles that might be blocking progress.
Focus on Tasks
Navigate to the Task Board page in Loop to focus on the tasks at hand. Go through the tasks that need to be completed and update their status. Make sure to assign responsibilities, so everyone knows what they need to do next.
Open Discussion
Provide an opportunity for everyone to bring up other topics or issues, updating the Loop pages based on the discussion. This makes sure all important points are captured and addressed promptly.
Wrap Up and Plan Ahead
As the meeting comes to a close, recap the key decisions made and clarify who is responsible for new tasks. Add any new tasks or updates to the Task Board that emerged during the meeting. This keeps everyone informed and sets a clear path forward.
We really like Loop being the home base for us during meetings. It gives plenty of flexibility, and just enough structure to keep us organized on track, while giving us the ability to take notes or collaborate with each other in the moment.
Adding More Structure to Loop
What we've talked about so far is just the essentials for a project in Loop, and you can expand on it to your heart's content. Here's a few ideas we've used it for:
- Additional task boards - we have a few different levels of managing tasks, particularly for our marketing process. Some rely on just the marketing team (which we've been talking about so far), but sometimes we need to assign things to our broader team for things like writing the actual blogs. We manage that in a different group/Planner Board, which we've added as a component on a another page in the Loop workspace.
- SOP's - Need standard operating procedures? Loop is another great place to house those. It doesn't give robust permissions/controls around them like some other tools may lean towards, but it does give you a home for some of the more "casual" processes where all you need is a pretty basic text editor to get things defined.
- More Marketing Copy - In addition to the links and messages page we built above, often we need a dedicated space just for "marketing copy". Things like product descriptions, social posts, or newsletters/emails.

