Practical Advice
Common Teams Meeting Mistakes - Tips For Beginners!
It's never fun when Teams meetings go poorly because of technical difficulties. In this post we'll spell out some basics you can use to make sure you're not the culprit.
The Nightmare
Have you ever lived through a MS Teams nightmare? You can see everyone’s mouths moving but you can’t hear anything. Or you start talking and you hear everyone chime in “you’re muted” and frantically search to fix the problem.
Palms sweaty, you feel like you’re MacGyver with a ticking explosive and if you don’t fix the issue in the next 30 seconds the whole thing will explode… Don’t worry I’ve got you.
This is how NOT to be “the problem” at your next Teams meeting.
Tip 1: Joining Teams via browser v. desktop app.
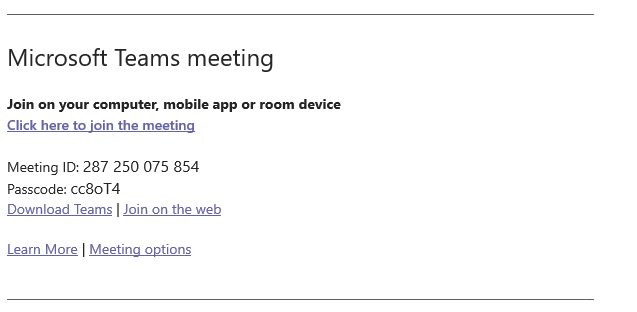
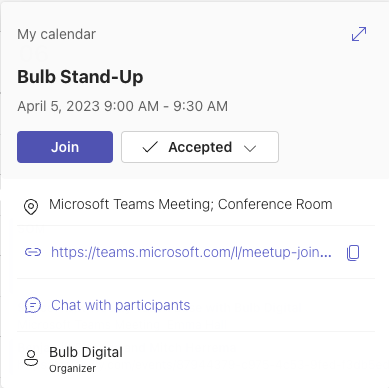
You always have two options when joining a Teams meeting from your device. You can join via a browser (think Chrome, Safari, Microsoft Edge etc.) or from the application – either the app on your phone or the app on your desktop. If you can prepare ahead, the experience is better joining through the app but if you don’t have the app downloaded and need to join the meeting quickly, joining via browser is an option.
Better performance/experience: Teams App
Join quickly: Web Browser
Tip 2: Test audio and video before the meeting.
Audio and video are the two most essential things to make sure you get right. There's a way you can test your setup before joining your first meeting:
In the top right of your screen, click the `ellipsis` (three dots), and select `Settings`
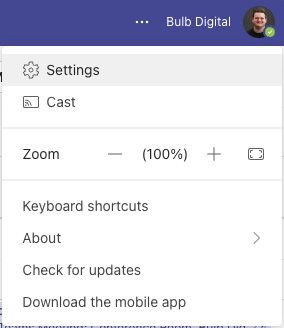
Next, select `Devices`
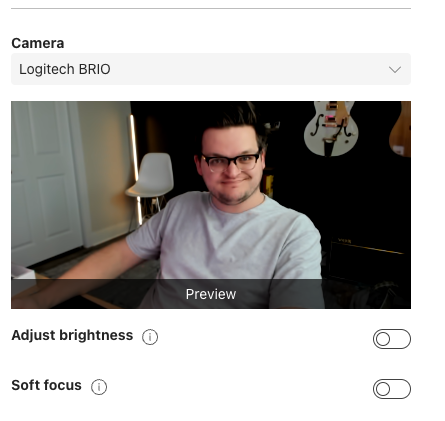
In here you will see what audio devices your computer is set to use and there are be drop down options to choose from if you have more than one option for speaker and microphone. If you scroll down you'll see Camera options too along with an option to adjust brightness. You can click in to the open camera settings to play around with exposure contrast etc. if you can tell your lighting isn’t how you want it.
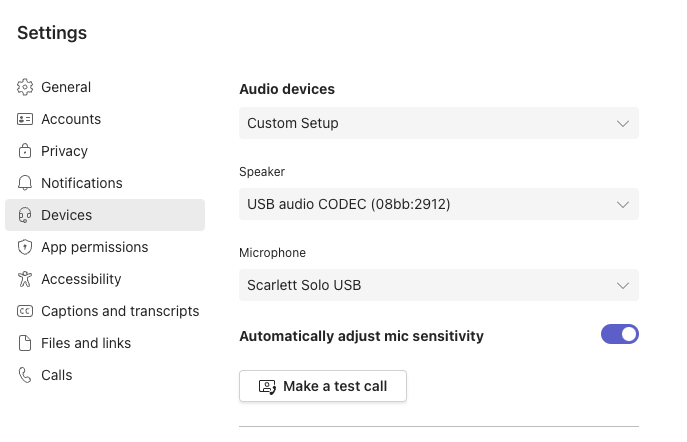
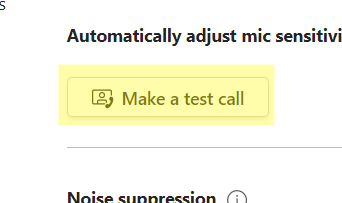
Once you have those set, you can click the `Make a test call` button to have the app simulate a call for you. It will ask you to speak and play back the audio to you to make sure you're coming in loud and clear. This is a good test to do any time you are at a new setup, get new equipment, or even in a new location you want to test.
Tip 3: Use preview screen to double check everything.
When you hit “Join” from MS Teams you'll get a preview screen, this is your chance to check everything out.
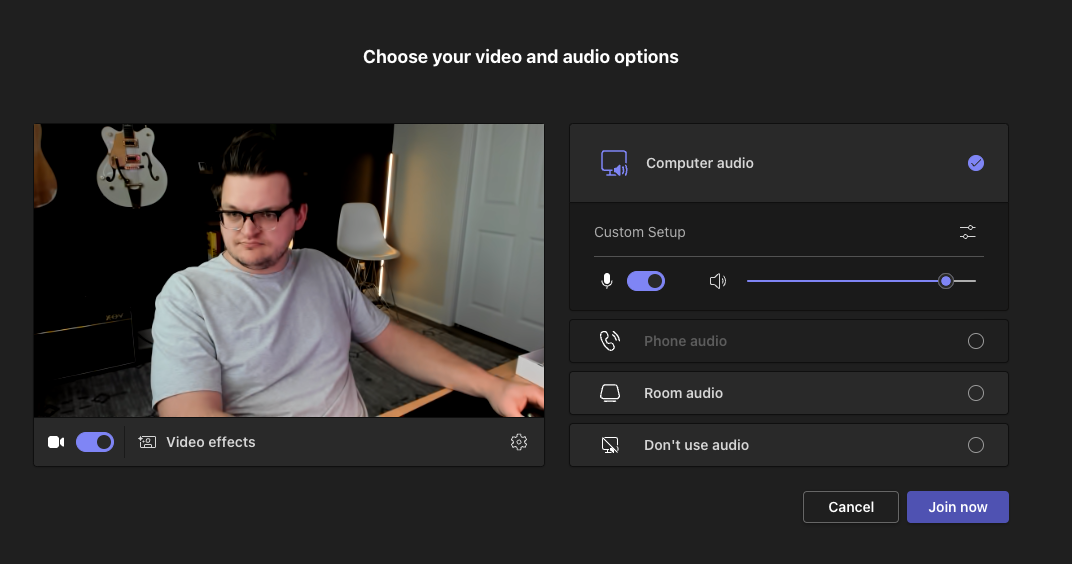
If something looks off, you can click the switch icon next to your audio settings to pop open a panel to select the right audio/video configuration.
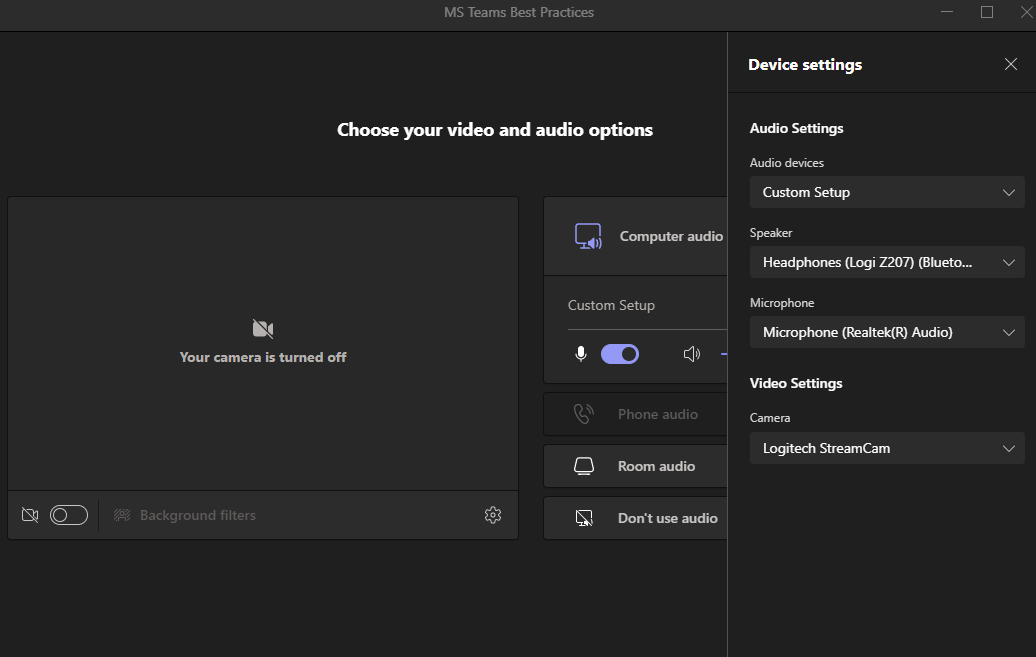
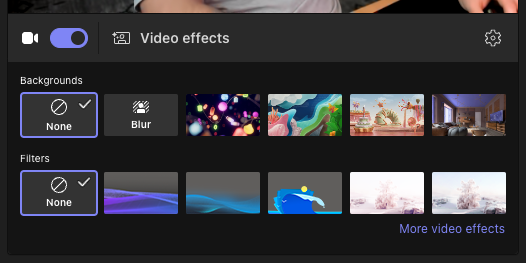
Adding in a blurred background is a nice touch and can make meetings less distracting for other participants if you have a lot happening behind you in a shared workspace or a cluttered home you’d rather not everyone to see. At the same time showing your workspace can be a great way to further connect with people as well, so it really depends on the meeting and the group.
If you click the `Video effects` icon it will open up settings to adjust your background/effects.
Tip 4: Use Phone audio option if necessary.
If all else fails, your computer audio is not working, you can choose the Phone audio option if it's enabled for your meeting, this allows you to call in after you join or you can have the Teams meeting call you.

Tip 5: Assume you are muted when joining a larger meeting.

MS Teams automatically mutes all those who join after 5 participants (including the organizer) have already joined, so rule of thumb is to assume you are muted when joining a larger meeting and make sure to unmute before you try to say something 😉.
Tip 6: Use reactions to share thoughts or feelings.

Use reactions – they are the best and an easy way to share a thought or feeling without interrupting fully. You can raise your hand by clicking the Raise hand icon on the top or choose “react” and choose which reaction you want to give.


Is Team Communication Holding You Back?
Find Out in Just 2 Minutes.
Take our quick scorecard to uncover communication gaps and hidden barriers within your team.
Tip 7: Open the chat to share information.
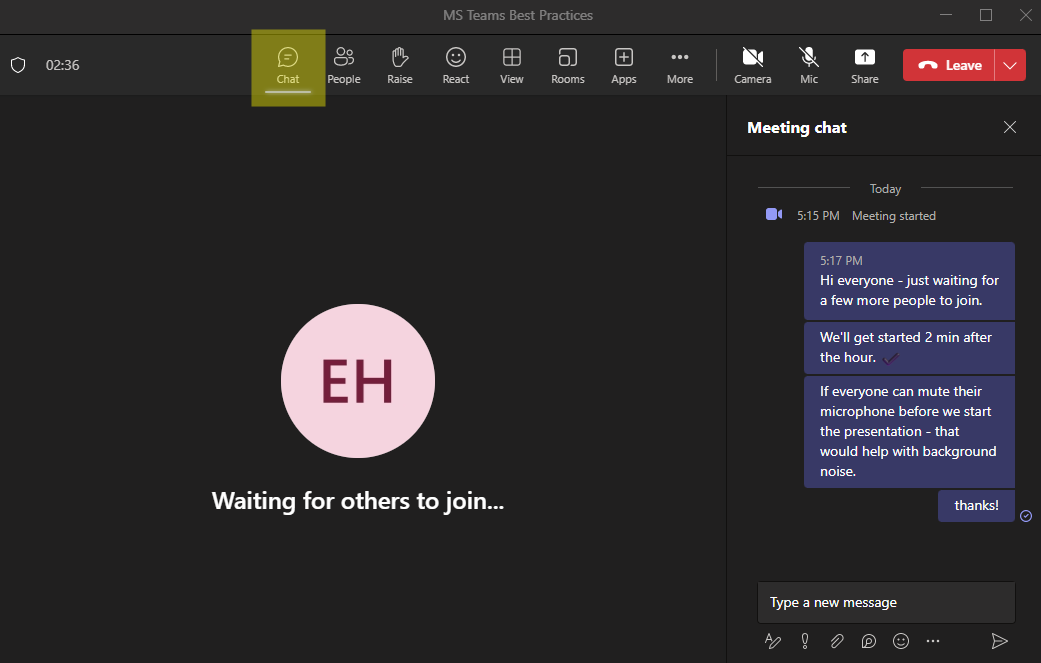
Open the chat! This is a great way to put further information for people to review while the meeting is happening, I love using this feature to share links if I’m trying to help someone find something. You can have the chat opened on another screen if you want by pulling your teams “chat” window open on another screen giving you a bigger reading area.
Tip 8: Turn video on and off by clicking the camera icon.

Turn your video on and off simply by clicking the camera icon once. You'll notice when you turn your camera off, it adds a line through the icon to indicate it's off.
Tip 9: Turn microphone on and off by clicking the mic button.

Turn your microphone on and off by clicking the mic button once. (Remember you may have been auto muted upon joining the meeting so clicking it the first time will unmute you).
Tip 10: Check toolbar to see if you are muted.
Yes, it is super annoying that you see everyone else with their neat little “muted” icon by their video in the meeting, but when you’re muted there isn't one that shows up on your video. I wish Microsoft would change this but the best check is looking at your tool bar and seeing if the microphone icon has the slash through it or not.
Tip 11: Use screen sharing options to your advantage.
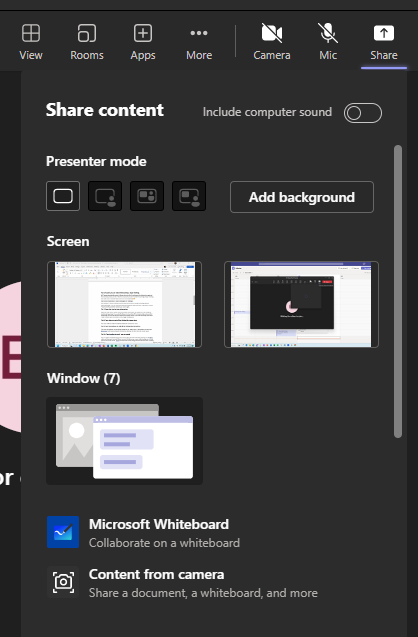
Sharing your screen – lot’s of options here especially if you use more than one screen. I like to use just the "share window" option so the participants only see that one window, but if you need to show multiple applications, sharing your full screen is the better way to go.
You'll notice that a red outline will display around the content you're sharing. If it's your screen, it will be around the whole screen, otherwise just the window you selectec.
Once you're sharing, I like to click my Teams icon in my lower toolbar and open the window that has everyone’s video in it and drag that over to my second screen, otherwise the video overlay only shows people on video who are talking, which is annoying when you're trying to gauge if people are reacting when you are talking.
Tip 12: Turning off video does not stop screen sharing.
Turning off your video does not stop sharing your screen. If you see that red box around your screen/window, then you are sharing!
Tip 13: Use share “window” option to imitate ability to pause screen like Zoom.

MS Teams does not have the Zoom feature of “pausing” your screen, so the only way to really avoid this is to just share a window. That way you can pull up other applications without showing all the moving around you are doing. Otherwise you can stop sharing and start sharing again, but I always find that a bit jarring since it changes the video/screen view back and forth for the participants.
In Conclusion
Prepare, test, and stay calm.
You can always leave the meeting and rejoin and that will allow you to start back at square one on your preview page.
Join a few minutes early and troubleshoot if needed.
If it’s an important meeting, try to join a few min early and troubleshoot if needed. Play some audio to ensure you can hear sound from your computer before joining. One of my favorite things a coworker does when he’s muted and trying to get himself off mute is to just raise his finger in the air. This signals to everyone that he is working on it and also gives us confidence that he’s heard us asking him to unmute.
Everyone fumbles with Teams meetings, so don't worry about it.
The more you use them the more confident you are with troubleshooting when things go wrong.
Overall, I hope this helps you stay calm and collected and not feel like “I’m the problem, it’s me” when meeting issues arise 😊


