Automate Your Time Off Request Process With Office 365
If you're looking for a better way to gather and approve your organizations time off requests, you can automate your process and store your requests all in Office 365.
Intro
Forms are an important part of many business processes (think expense reimbursement, purchase request, maintenance request, etc.). Many forms currently use technologies that are only marginally better than paper (email, PDF, Excel, Word, etc.). Much of the issue with these technologies is that you usually still need to have a human validate, transcribe, and communicate this data. In this article, we're going to use a fictitious time off request process to show you a few different ways you can create and automate this process in Office 365.
Time Off Request Process
For the purposes of this article, let’s talk about a process used to request time off. Below is a very high-level outline of what this process should look like.

Much of the work and decisions you need to make in using Office 365 is choosing the correct tools to combine and solve your problem. We are going to talk about specific tools that can be used to accomplish each of these elements and some reasons you might choose them.
Gather Data
The first step in any forms process is to gather data from the user. This is the “form” part of the process and largely involves presenting a user with an interface to enter the data. When gathering data, it is important to make it easy for the user to understand what they are being asked to enter and validate the data to reduce the amount of work needed once the data is submitted. Of all the steps in the process this is the one that has the most options in Office 365 and making a good choice is critical. Let's review each option in Office 365 to help you decide.
Microsoft Forms
Microsoft Forms is probably the most common starting point for anyone who is trying to improve their forms with Office 365. I don’t think it is a stretch to say this is because it has the word “forms” in the product name 😊. While Microsoft Forms can be used to create forms, users will often run into limitations quickly. This is largely because Microsoft Forms features are geared for surveys and quizzes and not for a full-fledged form builder.
Strengths
- Ease of use – Because Microsoft Forms has a very limited set of features it is extremely easy to use. Most users can create a new form with basic training and so long as their requirements fit inside what it can do, things will be great.
Weaknesses
- Field types - Microsoft Forms supports 8 dedicated field types. Several of these field types are focused on survey functionality (ranking, like, rating, and net promoter score). As a result, you will often need to use choice or text fields for things like currency, email address, person selector, etc.
- Field validation – Beyond selecting a field type and if the field is required, only very basic options exist to tell Microsoft Forms that it should only except specific data. For example, if you wanted to only allow a URL to be entered into a field there is simply no way to do this.
- Branching – Branching is a way to take show questions based on what a user responds. While branching is supported in Microsoft Forms, they only are useful on choice fields.
- Integration – The data that is submitted by users is stored in a custom Microsoft Forms location. This makes it a little bit more difficult to integrate with than some of the other options we are going to discuss.
- UI/UX – There is no way to customize the core UI (User Interface) and UX (User Experience) of a form. Yes, you can add pictures and change some colors using themes. But beyond that there are no options.
Time Off Request
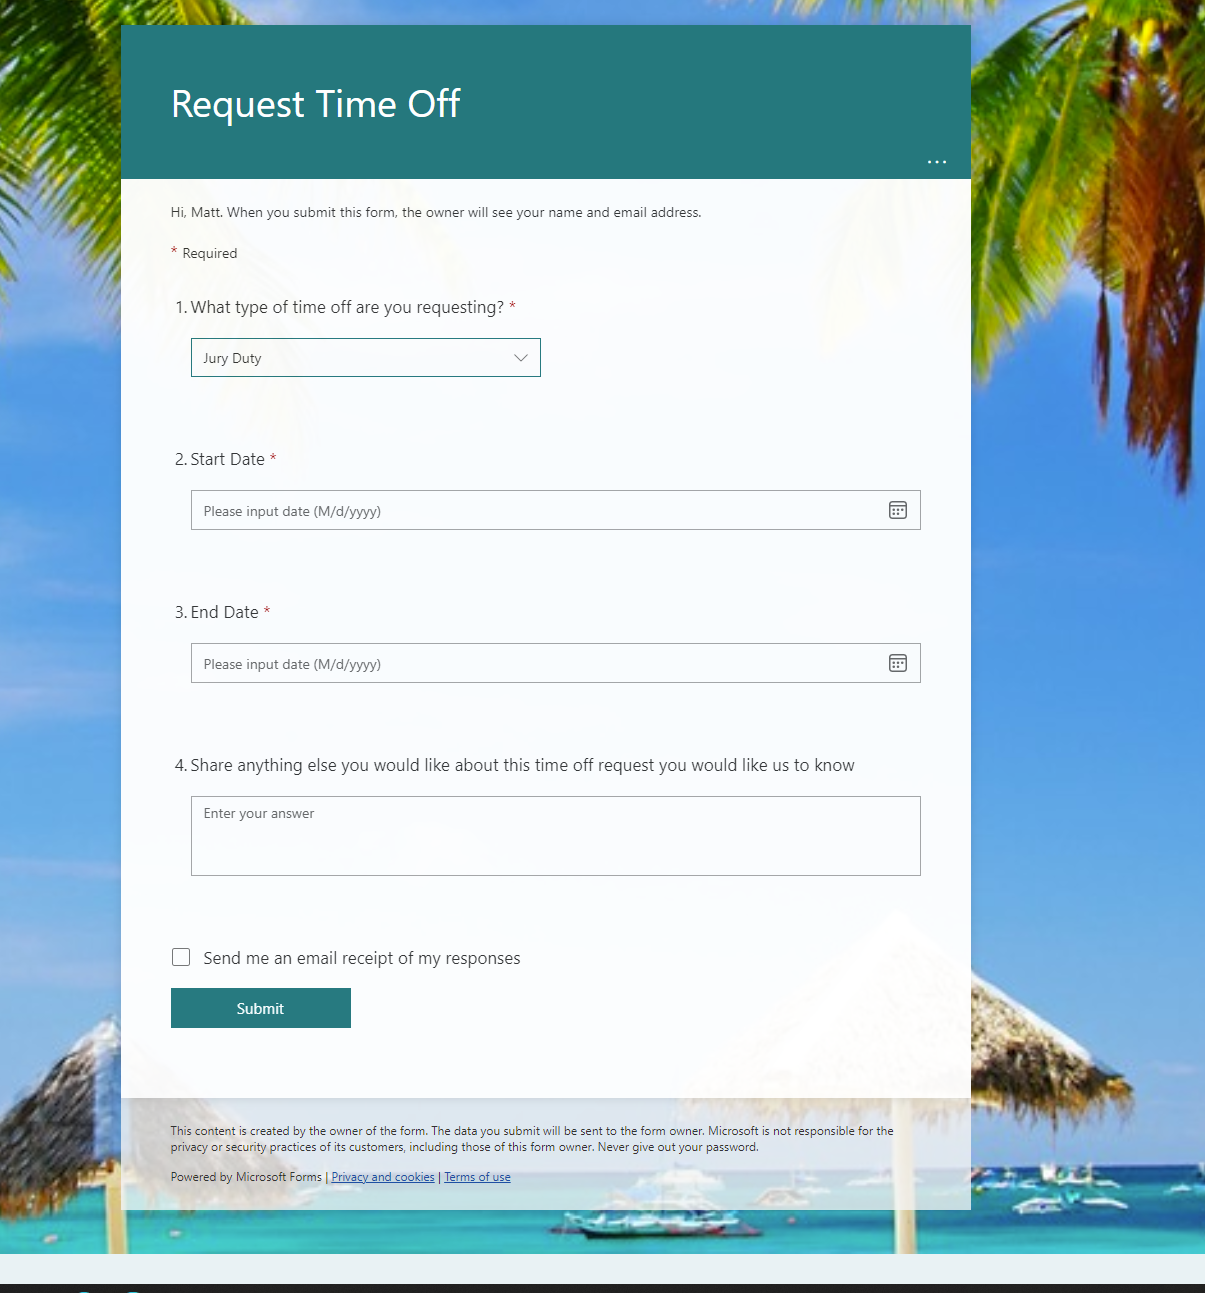
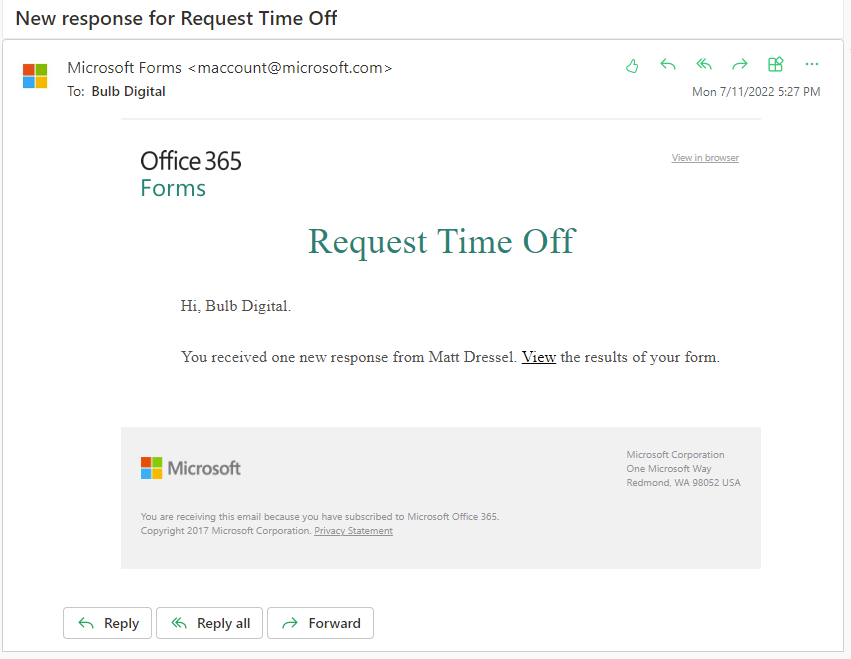
Given all of the weaknesses in Microsoft Forms, can we produce a viable Time Off Request form? Yes. Below are screenshots of what end users would see if you were to use Microsoft Forms for this purpose.
Highlights
- Start/end date validation – Ideally, we would want to have validation logic to make sure the start and end dates are validated. Because Microsoft Forms does not support this, all we can be sure of is that these fields are dates.
- Bereavement branch – Using the out of the box branching functionality, we were easily able to show a bereavement specific question only when that option was selected.

- Receipt Email – By simply selecting the option we were able to allow users to get an email with a link to the form they submitted.
- Notification Email – By simply selecting the option we were able to allow form owners to get an email each time a new form is submitted.
Recommendation
While it is true that Microsoft Forms can produce a form that will work for requesting time off, it is extremely rudimentary. You would be relying heavily on the user who is going to process/approve these requests to make sure things are accurate. Thus, I don’t think you will find significant benefit in using Microsoft Forms for this type of solution.
SharePoint List
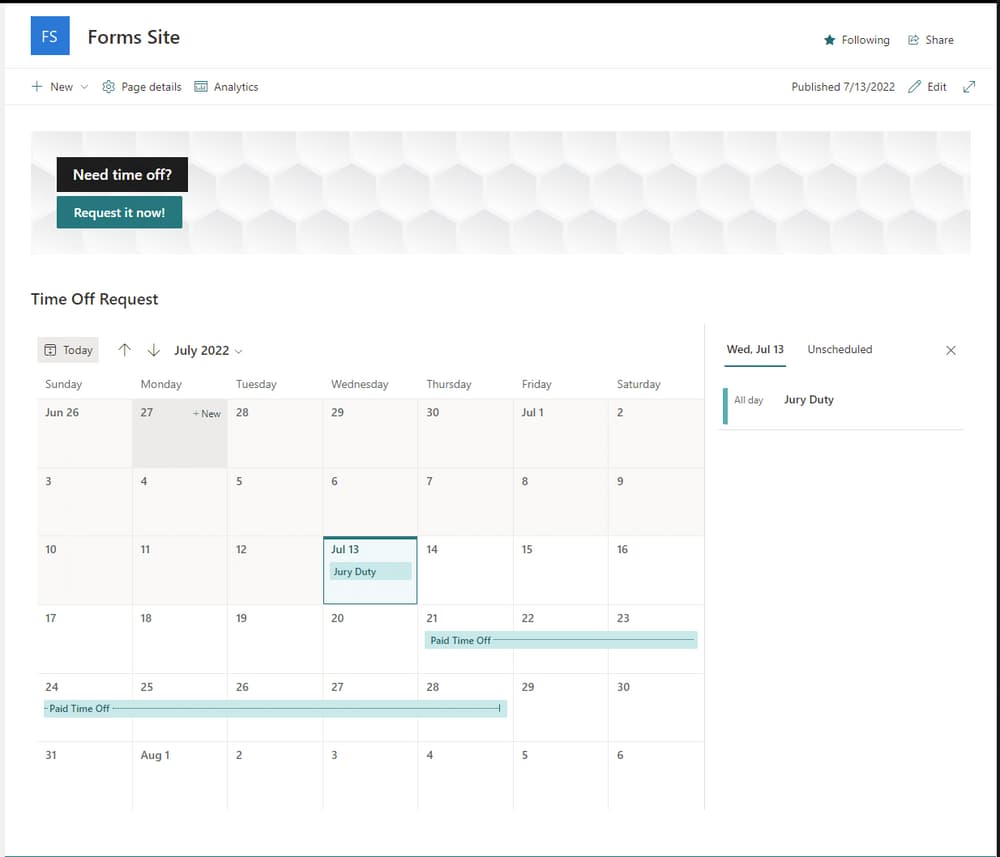
Another common tool used to create forms in Office 365 is SharePoint lists, which provide a fairly robust set of features. SharePoint lists are one of the cornerstone technologies for creating communication and collaboration sites. As a result, they are very much a “jack of all trades”, and you can use them in many ways. This means we have much more flexibility when creating forms. It also means there are sometimes an overwhelming array of options, and it can be hard to choose the correct one.
Strengths
- Easy to create – While creating a new list isn’t quite as simple as Microsoft Forms, they are still very easy to create.
- Configurability – As a cornerstone technology, lists are highly customizable. This is especially true when it comes to the basic functions of creating, viewing, and editing data.
- Data management – Unlike Microsoft Forms, SharePoint lists are built to manage data. So the form experience is only one thing it can do. You can also search, filter, and sort data that has already been entered into the list.
- Permissions – SharePoint lists have many options to share data with users.
- Integration into SharePoint sites – Being built into SharePoint allows you to easily integrate list content into SharePoint pages.
- Automation – SharePoint has deep integration points into Power Automate making it easy to add additional business automation to this data.
Weaknesses
- UI/UX – While the UI/UX built into SharePoint lists are configurable, there are limits. You are still building within an ecosystem that has constraints.
- Scale – When SharePoint lists get thousands of items management of the data can become a challenge. There are many ways to deal with this and there are many examples of lists with up to millions of items. However, additional design considerations must be thought of.
- Modern vs. Classic – Microsoft is still in the midst of migrating from SharePoint Classic to SharePoint Modern. This can create a confusing experience for users, specifically users who are creating lists and libraries. In many cases you will find that the modern experience is different or limited in functionality.
- Jack of all trades – Because SharePoint lists were built to be very flexible, you will find scenarios where what you want to do isn’t intuitive. You will likely need to do a search for an article to help you figure out how to do what you want. This is because this tool was not built as a forms solution. It just happens to be pretty good at forms.
Time Off Request
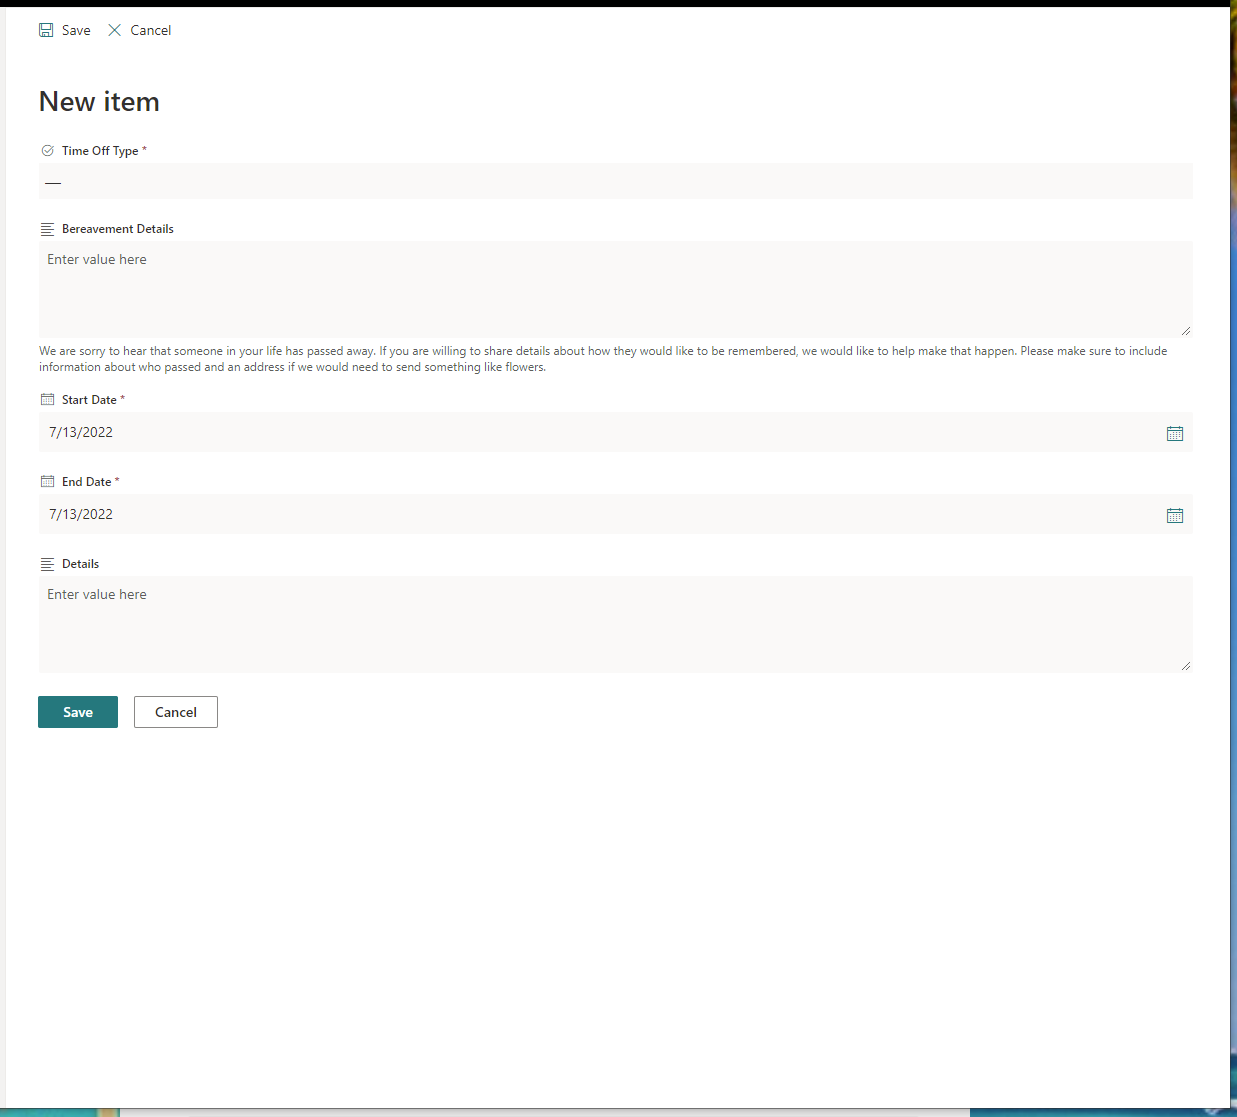
Creating a time off request form in SharePoint lists is not very difficult. The form is fairly simple, and you get a bunch of useful options that users are likely to appreciate.
Highlights
- Ability to view past requests – Because SharePoint lists have extensive data management functionality, we can easily create custom views to allow users to see their past requests. Note that this view will only show requests that the current user made.
- Start/end date validation – SharePoint provides a limited set of validation features. Specifically on fields and the list as a whole. Using this functionality, you can easily do the basic validation we are looking for. Note, that the validation only occurs when a user submits the request, not as they are selecting the start and end date.
- Bereavement Details Visibility – Using a feature called conditional formulas, you are able to only show bereavement details when the user has selected the type bereavement.
- Administrator view – In addition to a view that is useful for users who are filling out a form, you can easily create views that will show all data.
- Security – We do not want regular users to see all the data and we only want them to be able to submit new records. This can be easily supported using item-level permissions.
- Notification emails – While SharePoint does provide features to automatically email users when items are created/modified, these aren’t really a great option for forms where all users can’t see all data.
Recommendation
SharePoint lists can be a great solution to create forms, including a Time Off Request form. It is relatively easy to use and pretty full featured. The reasons to not use SharePoint for this purpose would be scenarios where your validation or UI/UX requirements simply can’t be done in SharePoint. In this scenario you still might want to use SharePoint lists, you just need to add in the use of a Canvas App. We will get to this next.


Is Team Communication Holding You Back?
Find Out in Just 2 Minutes.
Take our quick scorecard to uncover communication gaps and hidden barriers within your team.
Canvas App
The last major tool in Office 365 that could be used to create forms is Power Apps and specifically a Canvas App. Power Apps is a low-code tool to create applications that can be connected to many data sources and work on desktop, web, and mobile platforms. Canvas Apps are one type of app that can be created within Power Apps and is the most suitable for this specific discussion.
Canvas Apps are built on the concept of using a blank “canvas” on which you can place a wide range of components. These components can be galleries, forms, images, text, buttons, input controls, etc. You can also use a variety of formatting controls to help you make an application customized just to your needs.
For the purposes of creating forms, Canvas apps are by far the most flexible and configurable. They are also the technology that requires the most training and “thinking like a developer”.

Strengths
- UI/UX – You have extensive access to most visual elements. With this access you are able to make your form look exactly how you want.
- Data flexibility – Unlike both Microsoft Forms and SharePoint lists, Canvas Apps do not have any inherent data storage. Instead, you are able to connect a Canvas App with almost any data storage solution you want (SQL, SharePoint lists, Oracle, Dataverse, etc.). Note that to connect to most data sources that are not SharePoint lists users would need an additional license.
- Customization – You are in control of the application being used to gather data. This means you have almost unlimited ways to have custom business logic and functionality. It is simply a question of how much time you have to build it.
- Application (not just a form) – While you can build just a form, Canvas Apps can also build any other functionality you would like associated with your form. Think administration tools, viewing old form submissions, etc.
.png)
Weaknesses
- Building “from scratch” – While there are a bunch of built-in components, much of your application needs to be developed. Instead of just configuring things you are effectively building your form from scratch.
- Citizen developer oriented – While creating a Canvas App is different from developing a custom app, it does take someone with a developer/technology mindset. The average user will not be able to create this type of solution without significant training.
Time Off Request
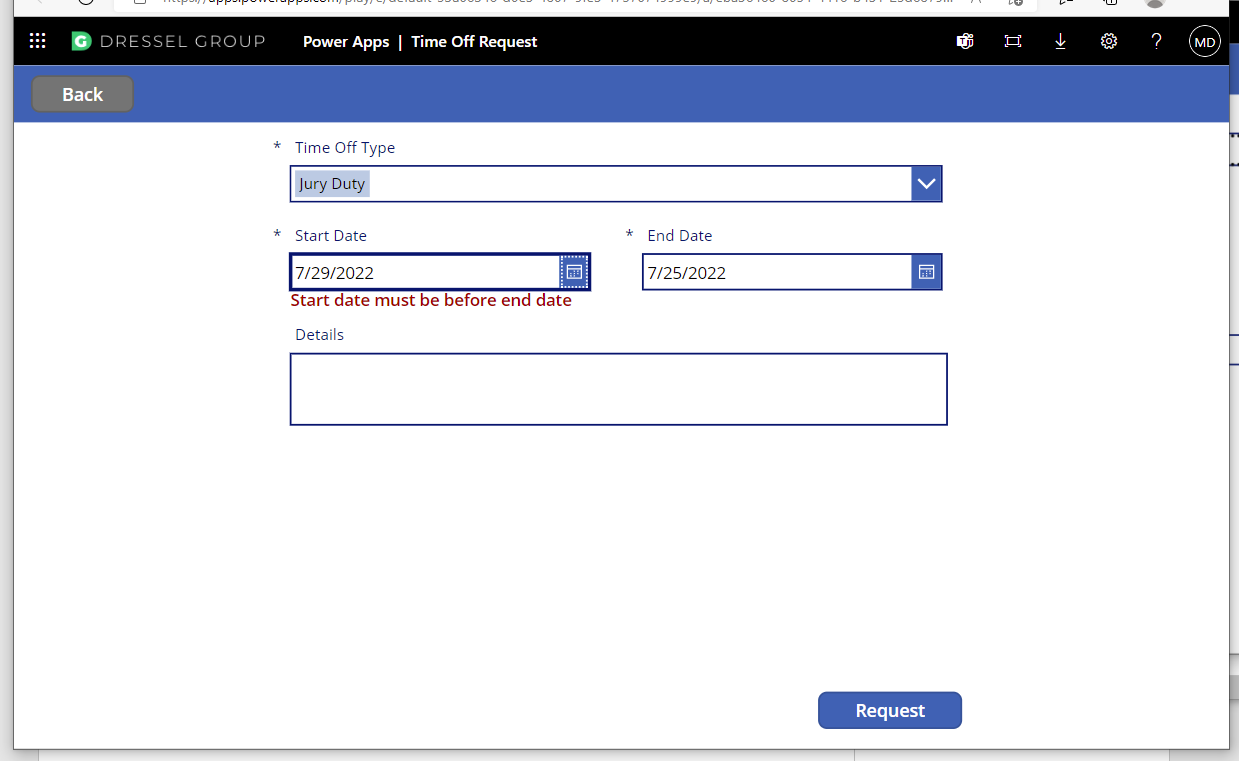
To create a Time Off Request Canvas App, you need to start by creating specific screens that are built to support your desired UI/UX. You also need to select where your data is stored. In the example below I am using the same list from our SharePoint list example. I am just using the Canvas App as the interface to create a new request.
Highlights
- App experience – The experience of this form is more like an independent application. You can also install this as an app in mobile and teams.
- Better error handling – In Canvas Apps you have very granular control over what business rules create errors/warnings and how/when those are displayed.
- Custom calendar controls – This example shows that you can create a custom calendar where users can look at their personal time off or team time off.
- SharePoint integration – All of the data is stored in SharePoint so we can use the SharePoint functionality for management and viewing data.
Recommendation
If you have very specific requirements for how the time off request process should work that involves custom UI/UX and business process, the only real option in Office 365 is to use a Canvas App. The main challenge with doing this is that the level of effort and type of skills needed to do this is much greater than the other options. You really need someone with some level of a developer mindset to develop and support a solution like this. Due to these risks, I would only implement this solution if you are prepared to manage/support this.
SharePoint List + Canvas App
At this point you might be thinking you like the ease of use that SharePoint Lists provide and the flexibility of Canvas Apps. The good news is that you can use these two technologies together in a way that might be the best case for what you're looking for. The basic idea is that you can customize a SharePoint List form using a Canvas App. This provides you with all the configuration and built-in view, list, and SharePoint page functionality with a custom Canvas App that is used for the create and edit experience.
Recommendation
In most cases I would recommend considering this approach before going directly to a Canvas App only. This approach allows you to reduce many of the weaknesses in these two options and can be a good starting point before going right to a dedicated custom Canvas App.
Other
While Office 365 has a robust set of tools to build forms, it isn’t the only game in town. There are a number of providers of dedicated forms solutions like:
- Formstack
- Typeform
- Cognito Forms
- JotForm
The good news is that even if you choose to use a forms solution that isn’t in Office 365 you can still integrate it using Power Automate. This means that you can still bring this data into something like SharePoint Lists so that the data can be managed.
Recommendation
In general, I would recommend using a solution outside Office 365 only when:
- The other tool provides an essential feature not available or hard to implement in Office 365
- You are already using one of these tools for gathering data
- What you are looking to do with forms would be “stupid simple” using another form tool
The main reason for this recommendation is that there is a cost for these other tools and the integration into Office 365 won’t be as “seamless”. In other words, there is value in using a single platform.
Automation (Notifications/Approval)
After you have gathered the information from the end user, the next step is to do something with this data. Before this might have involved emailing the filled-out form to someone. In Office 365 we can use Power Automate to automate many of the next steps, like:
- Notifying users
- Using logic to route the request
- Generating multiple requests to individual groups who need to perform specific tasks
- Creating tasks in task management systems
- Storing/updating data based on where it is in the process.
Time Off Request
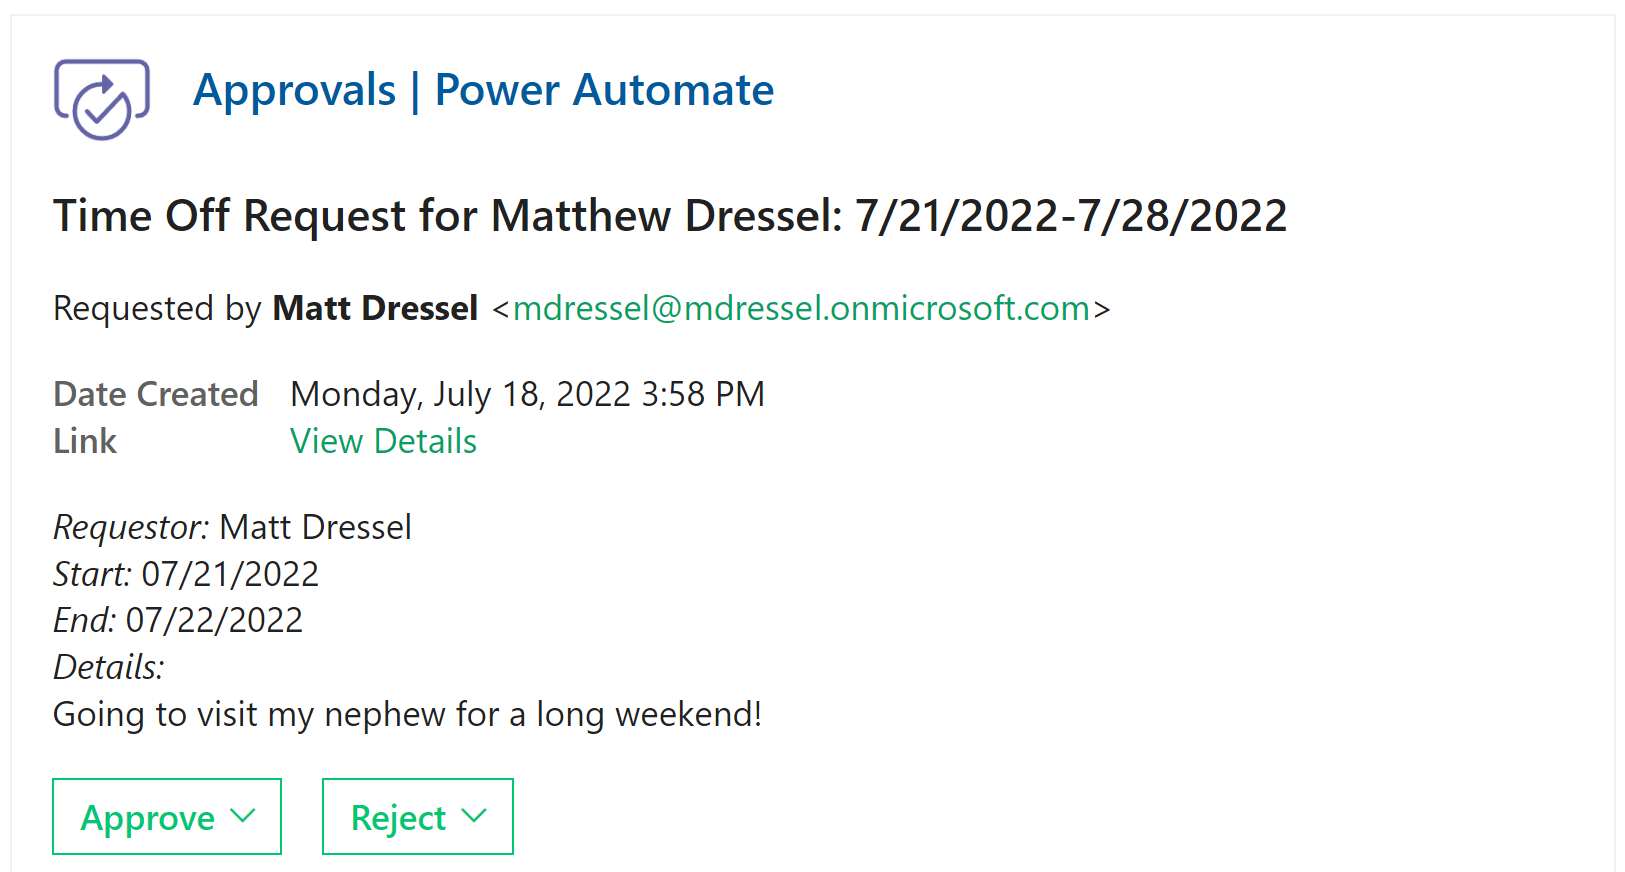
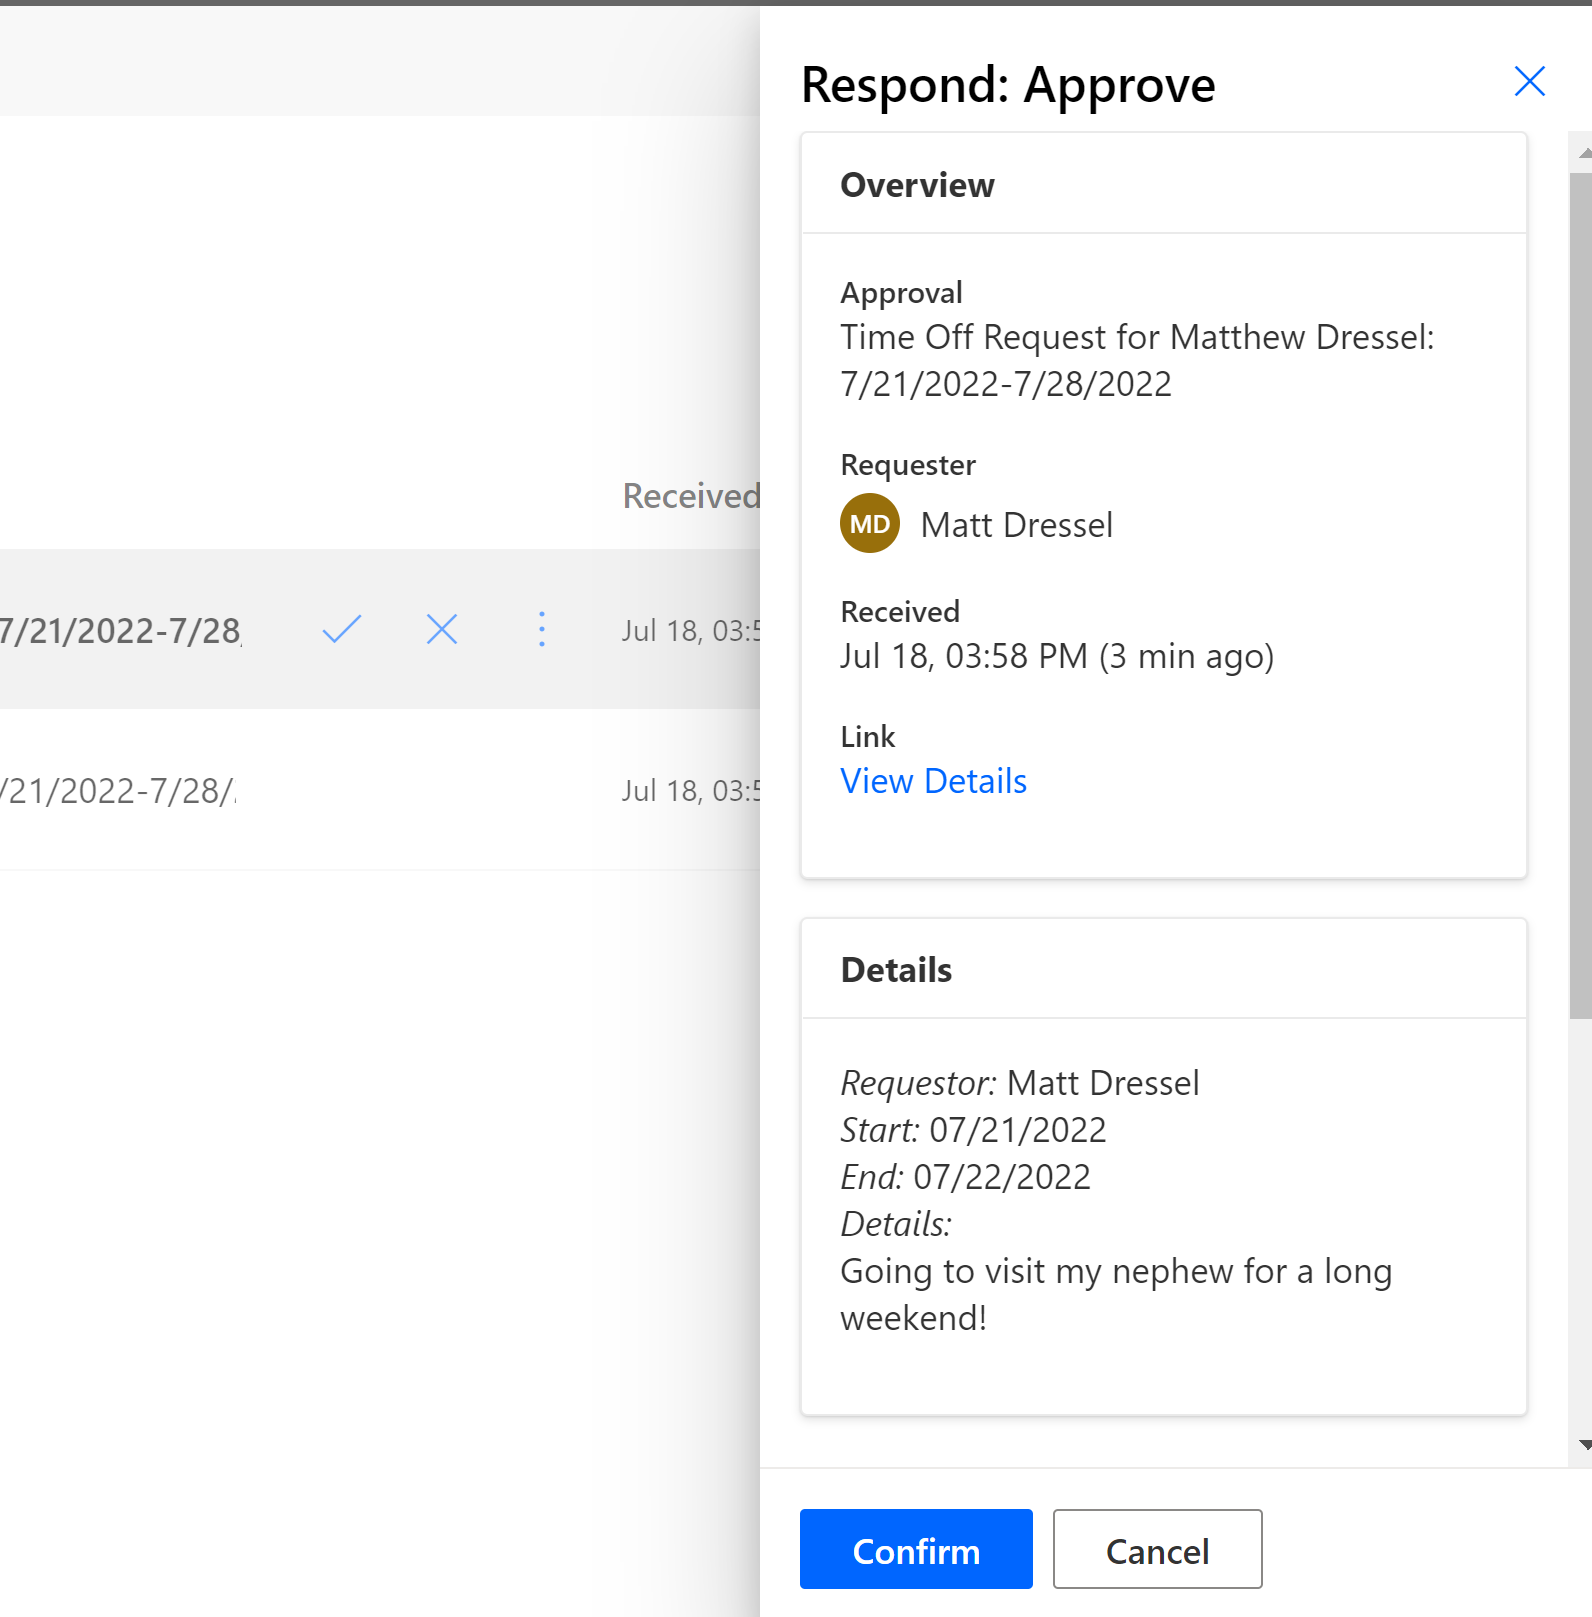
In the time off request example, we simply notify the approver and requestor at each stage of the process.
Data Storage
One of the big benefits of automating your forms using Office 365 is that you gain access to the data. You can use this data for several purposes.
- Analytics
- Dashboarding
- Notifications
Where Each Tool Stores Data
For each tool, you will store its data in a specific location, which will affect what options you have for reporting and viewing data. I am going to go over some basics of where the data is stored depending on the tool you are using.
Microsoft Forms
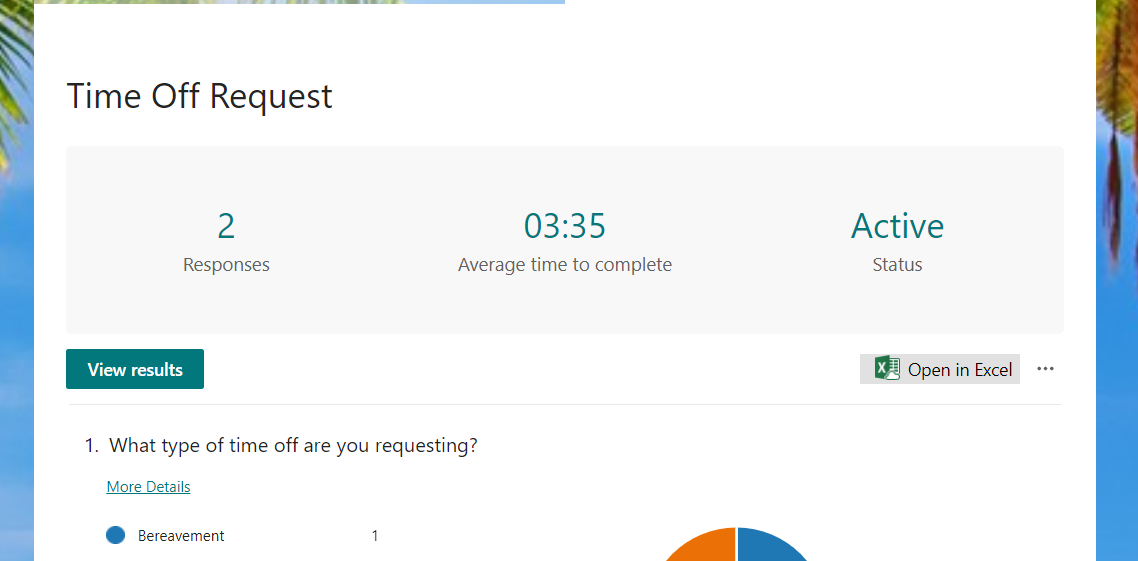
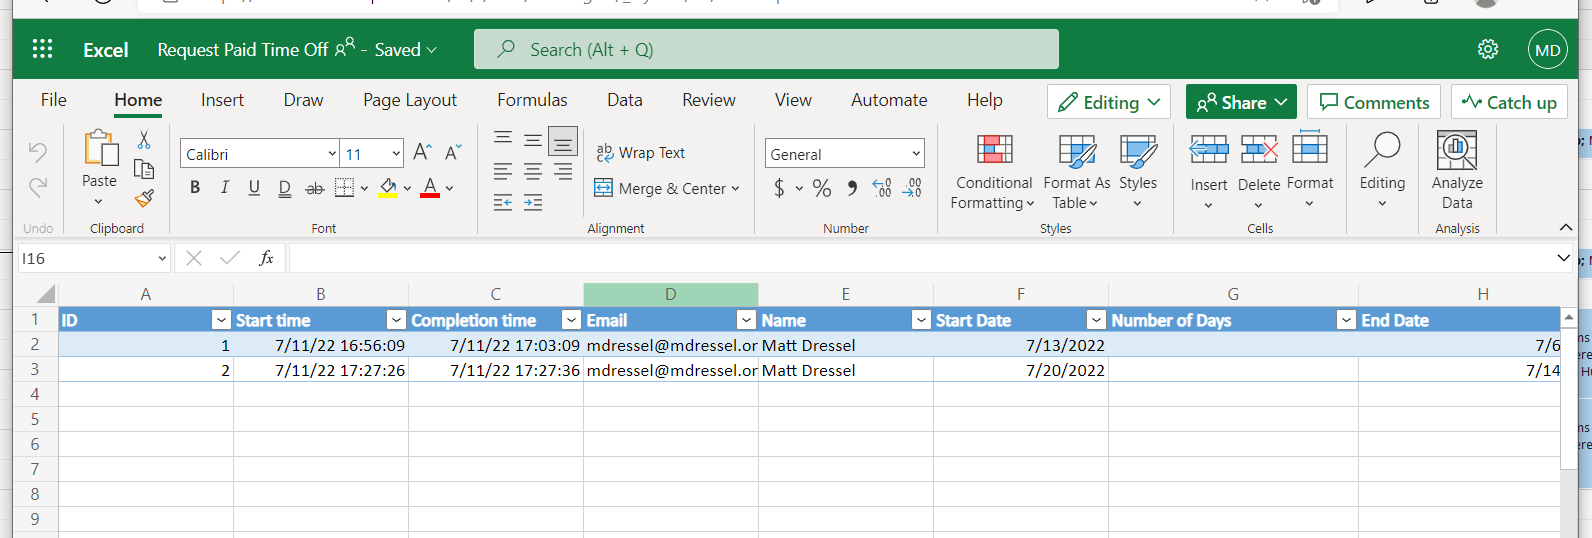
Data that is submitted to Microsoft Forms is stored in a custom data repository built on Azure. Microsoft also stores this data to an Excel file located in OneDrive or SharePoint. From this excel file you can use Power BI, Power Automate or other tools to report/view data. If you are looking for more advanced data storage, you can use Power Automate to make a copy of this data in something like a SharePoint list.
SharePoint Lists
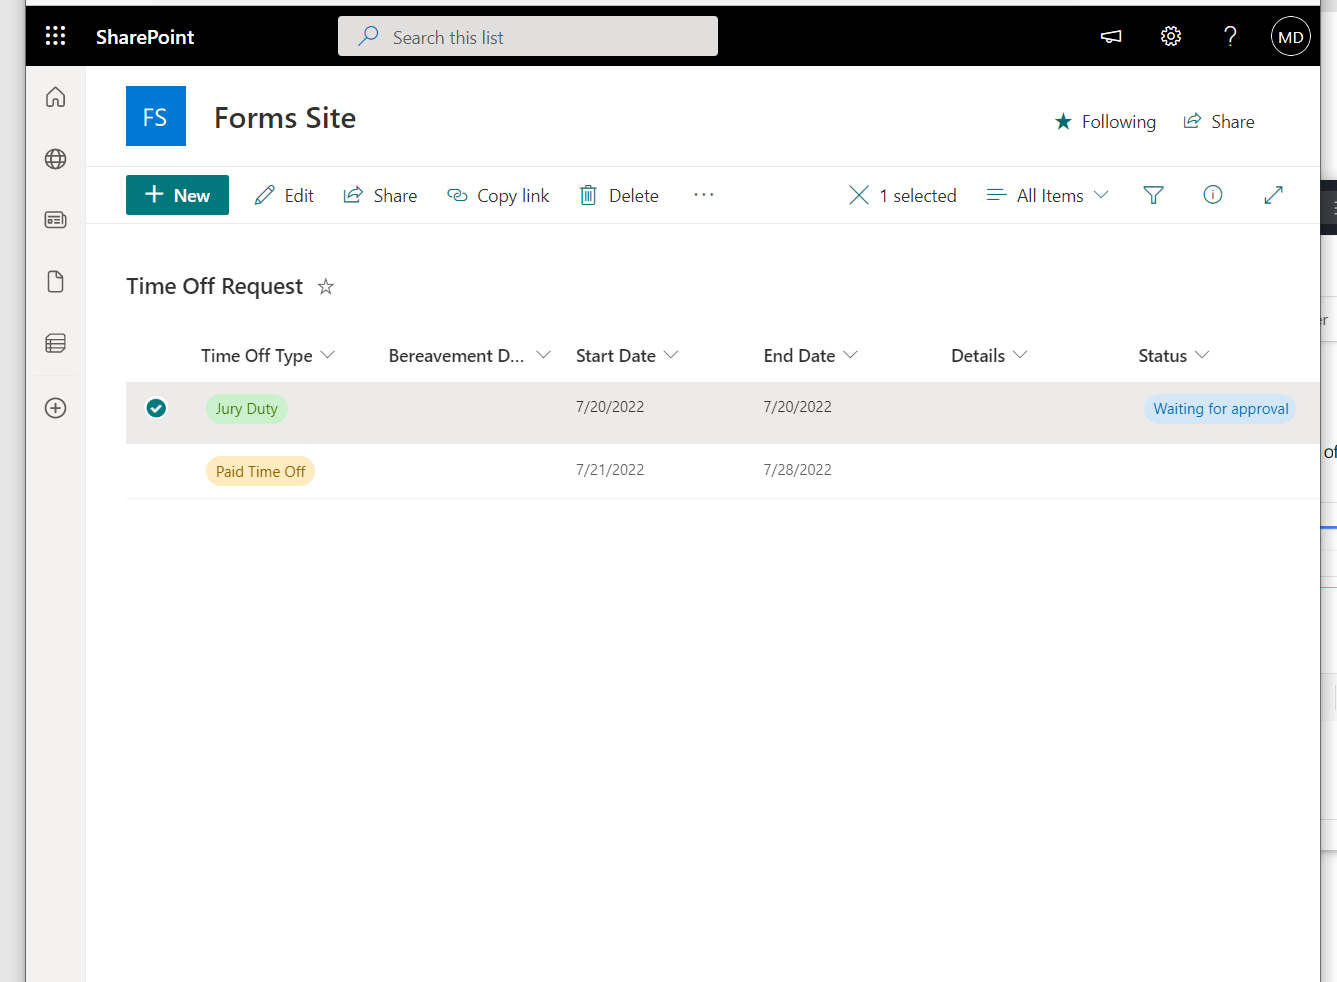
SharePoint lists are its own storage location, so all the data is readily available using the SharePoint interface or any number of public API’s. This makes it very convenient to access the data for reporting or other business purposes. On top of the data the user entered you can also store metadata about what has happened to the request after it was submitted. Think: status of the request, when the request was approved, and who approved it.
Canvas App
When you develop a canvas app data storage isn’t automatically defined. It is up to the developer of the application to choose where they want to store the data. With this said, the most common place data would be stored is SharePoint lists. This is because access to SharePoint lists does not require additional licensing, unlike SQL Server, Dataverse, Oracle or other data storage locations.
Approvals
Once a user has submitted their data you will likely want to review data related to the approval process. This data is stored in the Dataverse associated with the environment where the approval was created. So technically you can access this data and report on it. However, this is not very convenient or customizable. For example, if you have a multiple step approval process getting at and showing the data will be challenging. The other challenge is that connecting to the Dataverse requires a premium license.
Recommendations
I recommend using SharePoint as your data storage in most cases. If you are using Microsoft Forms, you would need to use Power Automate to get that data into SharePoint. I also recommend adding auditing information to the SharePoint site so you can keep track of who did what and when related to the business process regarding the request.
Wrap Up
Recreating a form in Office 365 isn’t hard and can really help you improve your business processes. Hopefully the example we used has given you some ideas on how you can use Office 365 in your business.

.jpeg)


