Simplify Your PowerApps Branding With A Theme Template
Ever wish your Power Apps looked better but didn't want to spend the time to make it happen? We've developed a customized theme template that takes very little time to set up and will make all your apps look great and consistent with your brand.
The Original
This past spring, I attended the Power Platform Online Conference and was very intrigued by Sancho Harker (iAm_ManCat)’s session about a Power Apps branding template he developed. I took some time to download and understand his files, and then adapted them with more global variables to work better for our company. Today I’d like to walk you through this solution (with a free download of it at the end), along with helping you understand the original “problem” when it comes to branding in Power Apps.
The “Every Control For Himself” Way
Let’s say you create a new canvas-type Power App from scratch and add 3 buttons to the first screen. If you want to change the color of these buttons to be the exact color of your brand, the most time-consuming way is to go into each individual button, click on its `Fill`, and update it with your new color.
.png)
You can imagine if you've got hundreds of controls throughout your app, clicking on each one individually to change something like color is way too time-consuming to be effective.
The "Copy and Paste" Way
The next best solution is to copy and paste all your controls from “already changed” ones. So you create a button, change it to look exactly like you want, and then copy and paste all future buttons from that one. You could even create a dedicated screen where these “stock” controls live to easily find them. Sounds better right? Well…. it’s still super annoying to have to copy and paste everything instead of just inserting new controls where you want them. But more importantly, what if you want to change something down the road? Uh oh - back to changing each individual control. Like we said before, way too time-consuming to be viable.
The "Global Variable + Copy and Paste" Way
An even better solution is to copy and paste the exact same way as the last method, but instead of these “stock” controls having hard-coded values for their branding properties (RGBA….), put global variables in their properties (VarColor). A great place to define these variables is in your app’s `OnStart screen`:
.png)
(*Note: after changing something in the app’s OnStart, make sure to click the ellipsis next to app and click “Run OnStart” for it to take effect)
Then you can go to your `“stock” control’s properties` and update them with the names of the variables you just created:
.png)
Now if you copy and paste all future buttons from this “stock” button, they will all have the global variables set in their properties. This means down the road if you want to change a certain property (like button color), you can just change it one time in the app’s `OnStart` where the variable is defined, and it will instantly change all buttons at once. Pretty nice!
.png)
If only there was a way to use global variables but get around that copy and pasting….
The "Theme Template" Way
Thanks to Sancho Harker (iAm_ManCat), we now know it’s possible to unzip a `.msapp file` and modify the default properties that Power Apps uses when generating new controls. And instead of changing these defaults to a different hard-coded value (so from one RGBA value to another), you can actually set the default to be a variable. Because of this, your brand-new inserted controls pop out with global variables as their property defaults! So this totally eliminates the need for copy and pasting. For example, the new button below has a `Fill` property of a variable called `Button.Fill`. Fill rather than the usual hard-coded RGBA value. Woohoo!
.png)
We’ve taken some time to identify and organize the branding properties we most care about and included them in our template’s `OnStart settings`. This way, any of these can be changed at any time, and they will automatically affect every control in your app (whether past or future). As an example, if we go into the `OnStart settings` and change the `Button.Fill`. Fill variable to `Colors.Primary1` (another variable defined earlier in the OnStart), it will change existing and new buttons to `Colors.Primary1` (which in our case is yellow). Pretty sweet!
.png)
.png)
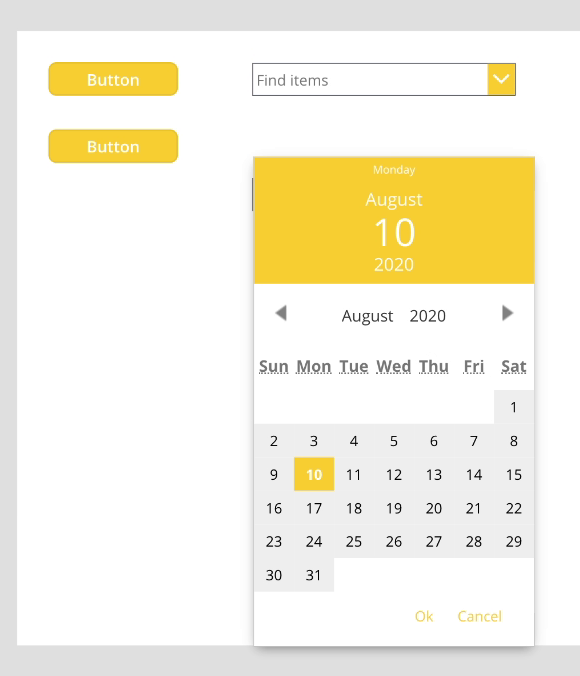
We have gone ahead and done this with every control so if we were to add some combo boxes or a date picker – without any copy and pasting, they are yellow instead of the default Power Apps blue. Yay!


SELF ASSESSMENT
Is your business getting full value from your M365 subscription?
Billions of dollars are wasted each year on underused subscriptions. Take 3 minutes to find out where your tools are driving results, and where they’re holding you back.
Find Out Now

Is Team Communication Holding You Back?
Find Out in Just 2 Minutes.
Take our quick scorecard to uncover communication gaps and hidden barriers within your team.
Copy and Paste Is Still Useful
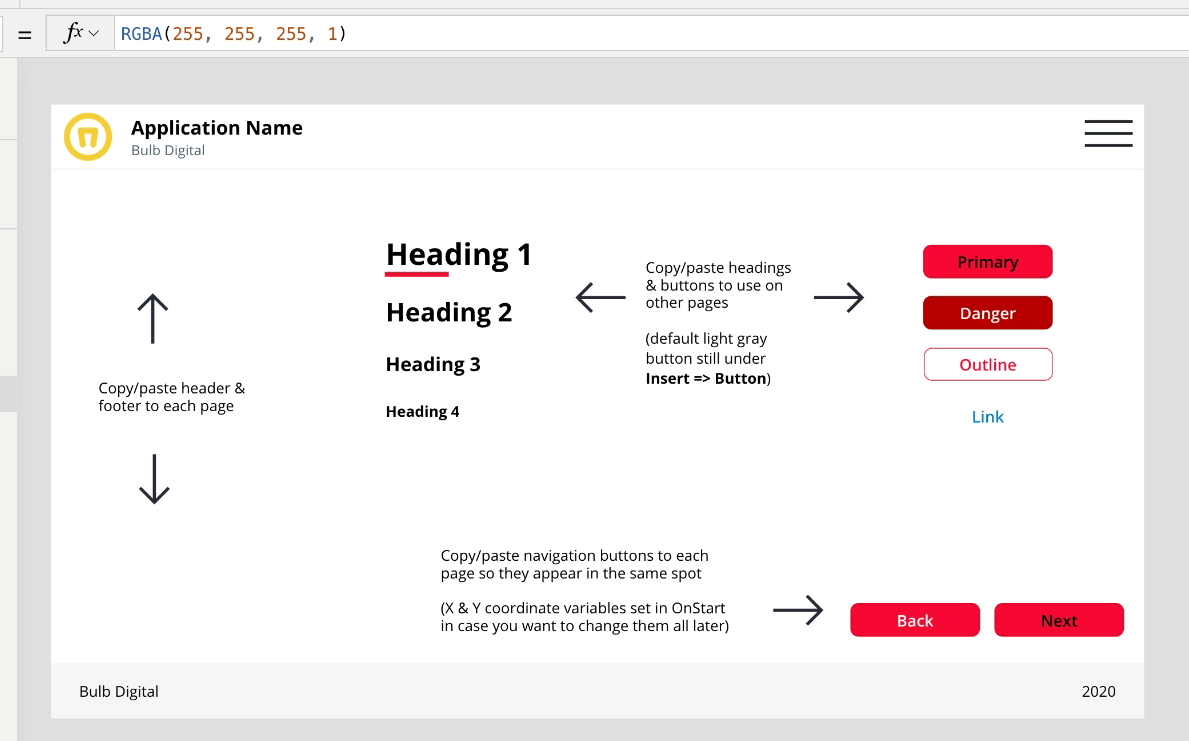
There are still going to be some controls that you want to copy and paste from a stock screen, and the only reason for this is because they're not default Power Apps controls. For example, if you want to use different colored buttons for different purposes throughout your app, unfortunately Power Apps only has 1 button control, so in that instance you’d want to set each different button to its own variables (added in the OnStart) and copy and paste them as needed. Another example is the use of different-sized headings, or even having “Next” and “Back” buttons that show up in the exact same spot on every screen in your app. We recommend putting these all on their own screen so you can easily find them when needed.

Headers, Footers, and Menus, Oh My!
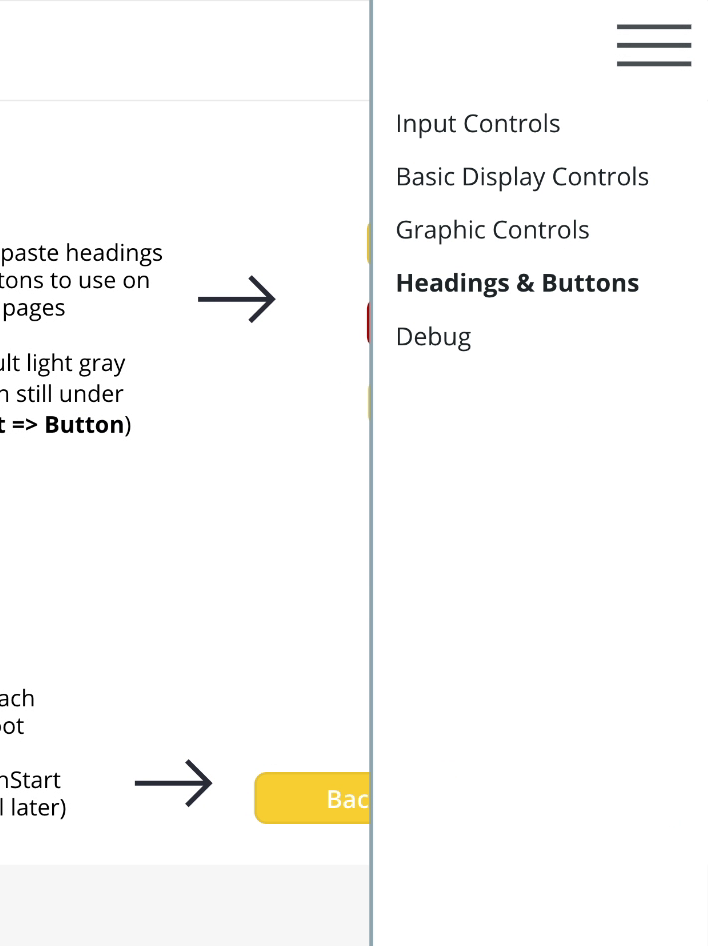
In our theme template we’ve also provided examples of a `header`, `footer`, and `hamburger menu` (to navigate between pages) that you can play around with and tailor to your needs. These were created as components so they can be easily added to every screen in your app to give it a very consistent look and feel:


Try Out The Theme Template!
Hopefully you can see that this kind of tool will really save you a lot of time when it comes to making your apps look great and consistent. Here are the steps to download, import, and use our theme template:
- Import by going to the Power Apps homepage, clicking on “Apps” in the left-hand menu, and then “Import canvas app” in the top navigation
- Open the app in edit mode
- Update the app OnStart settings to your company’s branding design
- Export the app and share with your company
- All future Power Apps your company creates should begin by importing this app rather than starting from scratch
Please check out iAm_ManCat’s original material here.


.jpg)

.jpg)


